
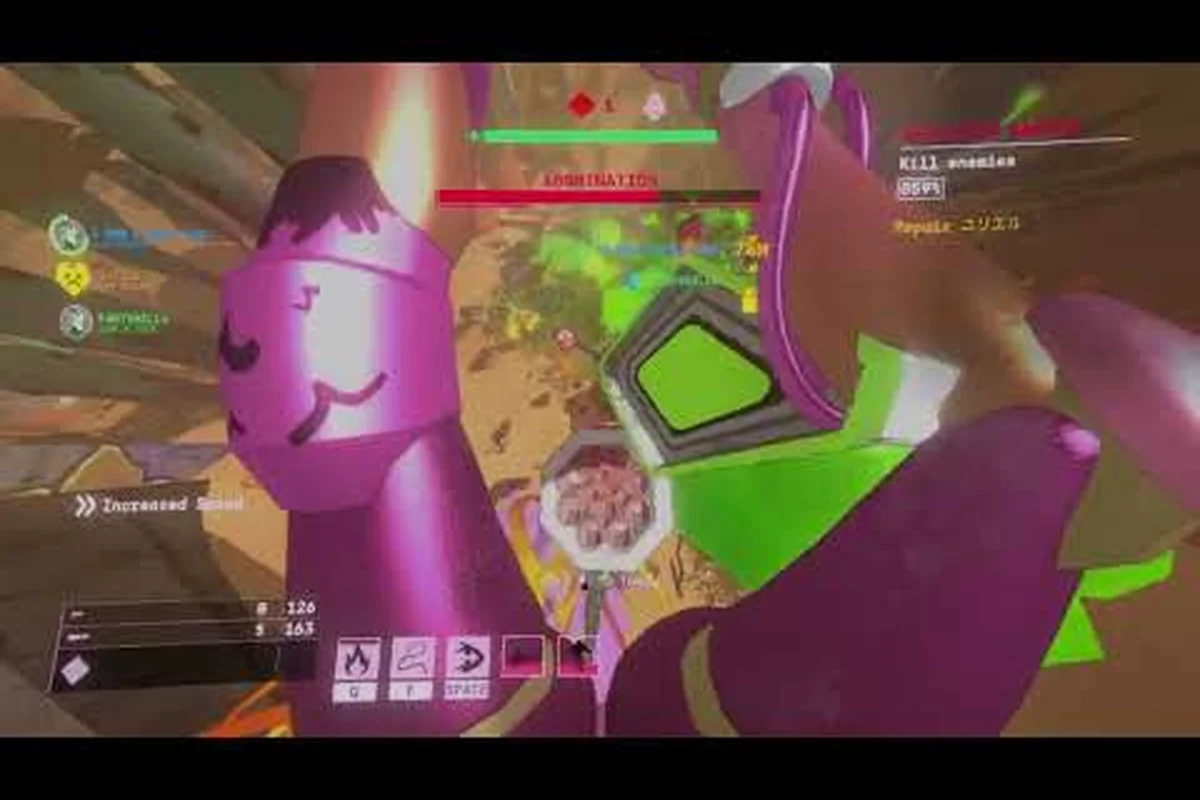
Tuning threat sliders and stacking the right backlog tasks is the single biggest lever between a clean extract and a four-down wipe. This Mycopunk difficulty guide walks through the threat 1-7 scale, which backlog tasks actually move your progression forward, how skin modifiers change your farming math, and the fastest path to bankroll Lottery Larry tokens without burning out your squad.
Reading the Threat 1-7 Scale
Mycopunk's mission difficulty is expressed as a single Threat level that runs from 1 to 7. The developer has explicitly stated in the 1.10.1 patch notes that there is no Threat 8 — that tier has been teased but is not currently live. Every region in the game — from the Shipping Lane's Gravity Farm through Moldy Tundra, Ice Floes, The Swamp, Flourishing Desert, Titan City and its City Outskirts variant, and the new X11-B moonlet — uses the same 1-7 ladder, so the slider behaves the same way no matter which map you queue into.
Threat governs four tightly linked things: enemy density, enemy health and damage, the Saxonite drop rate, and the chance for Antimass Substrate to appear as a secondary reward. Antimass is what you spend at the Pattern Infuser in the HUB for permanent Upgrade Grid power, and Antimass only really starts showing up in volume on Threat 4 and above. If you want to upgrade your weapons without spending Strange Components at the Turbocharge bench, Threat 4+ is where Pattern Infusion becomes your main resource path.
The official Saxonite drop rate at Threat 7 is roughly 60%, which is the headline number for farming squads. Below that, the curve drops fast — players report noticeably thinner loot at Threat 5 and below, and Threat 3 missions feel like a coin flip. This is why the community treats Threat 7 as the "real" farming tier and Threat 5 as a warm-up tier for new employees.
| Threat | Recommended Use | Saxonite Drop | Antimass Chance | Squad Stress |
|---|---|---|---|---|
| 1-2 | Tutorial, learning new weapon | Very low | Almost none | Minimal |
| 3-4 | Backlog task farming | Low to moderate | Sporadic | Light |
| 5 | Mid-game progression | Moderate | Regular | Noticeable |
| 6 | Endgame preparation | High | Frequent | High |
| 7 | Dedicated farming, lottery tokens | ~60% | High | Brutal solo, manageable in 4-stack |
Solo players should not anchor their progression to Threat 7. The game is balanced around 4-player co-op, and a single Scrapper or Wrangler at Threat 7 is fighting an attrition battle against respawning Amalgamations, Abominations, and the tougher variants like the Abomination Lacerator. The how to play solo guide covers that scaling problem in more depth, but the short version is: a solo player should treat Threat 4-5 as their farming ceiling until they have a reliable squad to queue with.
What Threat Actually Changes
Beyond the headline numbers, Threat also flips the dial on mission modifiers. These are the little twist cards that show up at the start of a queue — extra enemy waves, environmental hazards, fewer healing drops, exploding barrel enemies, and similar pressure multipliers. The pattern is that higher Threat pools more modifiers together, so a Threat 7 run is rarely a "clean" version of a Threat 4 run; it is a Threat 4 run with two or three extra knives in the room.
A practical reading: pick your Threat by what you actually need, not by what feels impressive. If you are after Antimass for Pattern Infusion, Threat 4-5 is the efficient zone. If you are building a token bank for Lottery Larry skin rerolls, Threat 6-7 is the answer because lottery tokens drop as a Threat-scaled reward on the Cargo Pod screen.
Backlog Tasks and What Actually Matters
The Backlog is Mycopunk's tiered reward program, added in update 1.2, and it sits between the Codex and the mission board in the HUB. It is the long-running checklist that does not depend on which mission you run — it tracks cumulative progress across all of your sessions, then pays out in cosmetic rewards, lottery tokens, and the occasional Fulfillment unlock. The 1.0 launch reshuffled a handful of backlog tasks to match the new HUB layout, so older guides that reference pre-1.0 tasks no longer line up with the live UI.
The single most common mistake new players make is treating the backlog as a to-do list they can brute-force in one session. It is not. Most backlog tasks are tracking-based, meaning the game counts discrete events (missions cleared, enemies killed, regions visited, employees leveled) and pays you out when the counter ticks over. The pace is set by the game's underlying counter cadence, not by your APM.
Backlog Task Categories
The live backlog breaks into roughly four families of tasks, and your farming strategy should rotate between them rather than grinding one exclusively — grinding only Lottery Larry token drops from Employee Mastery, for example, leaves your Region Sweep and Mission Variety meters frozen, while pure mission-type chasing starves employee XP gains needed for the Employee Level 30 cap. A balanced rotation that swaps loadouts between sessions typically clears 2–3 backlog tasks per hour instead of the 0–1 you get from tunnel-visioning a single category, which is why veterans treat the four families as a coupled system rather than independent checkboxes.
| Category | What It Tracks | Fastest Way to Progress | Payout Type |
|---|---|---|---|
| Employee Mastery | Level each of the 5 employees to 10, 20, 30 | Run missions on the employee you are weakest on | Lottery tokens, Fulfillments |
| Weapon Tryout | Use a specific weapon N times | Slot it in your loadout for a few missions | Lottery tokens, Hat cosmetics |
| Region Sweep | Complete missions in each of the 7 regions | Run the lowest-coverage region first | Lottery tokens, sit emotes |
| Mission Variety | Clear each of the 14+ mission types once | Stack low-stress types (Prized Possession, The Couch) | Lottery tokens, skins |
The Employee Mastery family is the backbone of a real backlog push because every employee levels whether you want them to or not — but they only level if you play them. The cap is Employee Level 30, after which a final reward pushes you toward the Weapon Level 32 milestone. Players who ignore the alt characters stall on these tasks for weeks.
Weapon Tryout tasks are the most underappreciated. If you only ever play the same Bruiser Shield Projector build, the backlog tracker sees you using a tiny slice of the 16-weapon roster. Swapping the Swarm Launcher or the Diffraction Driver into your loadout for a few missions is often the difference between "stuck" backlog progress and a sudden token dump.
For a deeper breakdown of which loadout swaps are worth the effort and which weapon unlock paths take the longest, the advanced strategy guide is a useful companion read, especially for the Ouroboros-exclusive Contraband and Oddity rarities that some backlog tasks gate.
Backlog Task Pacing
The community consensus, which matches what the developer has hinted in the HUB rework patch notes, is that backlog payouts are tuned to roughly weekly cadence per task family. Trying to finish the entire backlog in one weekend is fighting the design. A more realistic rhythm is to look at the backlog before queuing, pick one or two under-tracked families, and lean your session toward them — then take a break and let the rest catch up.
A practical weekly loop for most players looks like three focused sessions of roughly 1-2 hours each, spread across the week rather than compressed into a single play block, since the backlog payout tuning assumes you are coming back over several days. Front-load your easier under-tracked families (Region Sweep, Prized Possession, Population Control) early in the week, then save the higher-stress Threat 6-7 farming for Saxonite, Antimass, and lottery tokens once your employee roster has had a chance to level up from the prior runs.
-
Session 1 (Threat 4-5, 1-2 hours): Run one region you have not visited in a while to clear a Region Sweep task, using a weapon you have not touched this week.
-
Session 2 (Threat 5-6, 1-2 hours): Stack two mission types you have not completed — Prized Possession and a Population Control are good low-stress pairs — and play the employee with the lowest current level.
-
Session 3 (Threat 6-7, 1-2 hours): Dedicated farming for Saxonite, Antimass, and lottery tokens, with the backlog as the secondary goal.
That three-session rotation clears the bulk of weekly backlog tasks without burning out, and it leaves room for Ouroboros or Escalation runs on the side when you want a break from the standard mission loop. A reasonable rule of thumb is to cap side-content at 30-45 minutes per session, since the Skin Modifier rolls from Ouroboros and the Escalation-tier Antimass drops share a soft cooldown with your farming session — pushing both grinds in the same play block will noticeably thin out your lottery token returns from Lottery Larry compared to running them on separate days.
Skin Farming and Skin Modifiers
Skin farming in Mycopunk is a layered system, and most players only see the top layer. The visible layer is the per-weapon skin (Leopard on the Wrangler, Brawler on the Bruiser, Tiedye on the Scrapper, Firestorm on the Glider, Telepathic Charging on the Swarm Launcher, plus the universal skins Crystalline, Rainbow, Skeletal Ghost, Entombed, Uniform, and the Chrome skin from the Supporter Pack). The deeper layer is skin modifiers — the underlying stat tweaks attached to each cosmetic that the Codex does not always spell out in plain language.
Every weapon skin in the game rolls a small set of hidden modifiers when you equip it. These modifiers affect things like projectile speed, reload time, damage against a specific element, or the chance for a status proc. Because skins share a mod pool within a rarity band, two copies of the Crystalline skin on the same weapon will not necessarily behave identically. The Codex lists the rolled modifiers for skins you have inspected, so opening Codex entries is the only reliable way to see what you actually got.
The Modifier Tiers
The modifier system is not officially published as a closed list, but the community has mapped the common rolls into a rough tier hierarchy. This is based on player-reported rolls rather than developer documentation, so treat it as a farming guide, not gospel.
| Modifier Tier | Typical Effect | Best Use Case | Farming Target |
|---|---|---|---|
| Damage Boost | +small % damage on a damage type | Boss melt, Amalgamation timers | High Threat runs |
| Elemental Synergy | Stronger cryo/shock/plasma procs | Crowd clear, status stacking | Elemental mission modifiers |
| Utility | Faster reload, larger mag, swap speed | Solo play, sustained fights | Low Threat farming |
| Niche | Specific enemy bonus, environmental resist | Challenge missions | Region-locked tasks |
The key insight for skin farming is that utility-tier modifiers are usually the best choice for solo players, because they smooth out the rough edges of a 1-3 player squad. A damage-boost modifier is wasted if you are constantly reloading and dodging. Elemental synergy rolls are the crown jewel for 4-stack Threat 7 farming, because a fully stacked plasma or cryo proc on a Brute is the difference between a clean kill and a 30-second attrition fight.
The official skin roster is short and intentional. Beyond the per-employee skins listed above, the only confirmed universal skins are Crystalline, Rainbow, Skeletal Ghost, Entombed, Uniform, and the Chrome skin from the Supporter Pack DLC (appid 5092090). If a guide or video claims a skin name that is not on that list, treat it as speculation — the developer has not published anything outside this roster as of the 1.0 launch.
Skin Modifier Reroll Strategy
Skin modifier rerolls are tied to Lottery Larry tokens, which is where the token economy and the cosmetic economy intersect. Every roll you burn through Larry's reroll machine costs tokens, so the optimal strategy is not to reroll endlessly — it is to bankroll tokens until you can target a specific tier of modifier on a specific weapon, then reroll aggressively on that target.
The targeting logic is straightforward but easy to misread: each press of Larry's reroll machine rolls a fresh modifier on the currently equipped skin slot, not a saved inventory item, so swapping weapons mid-session effectively wipes your targeting and burns tokens on a slot you may never equip again. Plan your sequence before you queue at the machine — lock the target weapon, confirm it is the one in your active slot, then start rolling. This single sequencing step is the most common reason a player walks away from Larry with 300 tokens spent and a Bruiser skin they never actually run.
-
Pick the one weapon you actually use most — for most players, that is the Bruiser's primary or the Swarm Launcher for crowd clear.
-
Identify the mod tier you want (Elemental Synergy for crowd clearers, Damage Boost for boss melters, Utility for solo play).
-
Bankroll tokens until you can absorb the average reroll cost — players report an average of 8-15 rerolls per desirable roll, so you want a buffer of at least 100 tokens before serious rerolling.
-
Reroll on the target weapon only, and use the Codex to read every result before locking in.
The contrast in token efficiency is brutal in practice: a disciplined player banking 400-500 Lottery Larry tokens and rerolling exclusively on a single equipped weapon (say, the Bruiser's primary) can expect to lock in a Damage Boost or Elemental Synergy mod within 8-15 attempts, while a player who spreads 200 tokens across the Bruiser, Swarm Launcher, sidearm, and two melee slots is statistically guaranteed to walk away with at least one mid-tier roll on a weapon they never actively equip. The reroll machine's targeting is slot-locked, not inventory-wide, so every weapon swap mid-session resets the probability curve on the slot you actually care about and burns tokens on cosmetic slots that contribute zero combat value. Treating tokens as a single concentrated resource — rather than a smorgasbord to be sampled — is the entire economy: concentrated rerolls beat scattered rerolls almost every time, especially when the cost of an average desirable roll already sits in the 8-15 reroll range reported by players running the Codex overlay.
Lottery Larry and the Token Economy
Lottery Larry is the insectoid HUB NPC running the skin-reroll booth, and he sits next to the Lost Loot Terminal and the Pattern Infuser. His entire economy is built on Lottery Larry tokens, a soft currency that drops from missions, the Cargo Pod screen at the end of a run, and the Backlog. He does not accept Saxonite, Antimass, Strange Components, or any other resource. If you are trying to reroll a skin modifier and you are short on tokens, the answer is always "run more missions" — there is no shortcut.
The token drop rate is not officially published as a single number, but community data from the 1.0 launch window suggests a baseline of around 5-15 tokens per Threat 5 mission, scaling up to 20-40 per Threat 7 mission when the Cargo Pod lands a token reward. The Backlog is the real long-term source, though — a fully completed backlog track pays out 200+ tokens per category, and there are four categories, so the backlog alone can fund a serious reroll session.
What Lottery Larry Actually Sells
Larry's machine is not a cosmetic store. You are not buying specific skins from a list. You feed tokens into his machine, the machine spits out a random skin modifier roll for the weapon you have equipped when you interact with him, and the result is recorded in your Codex. There is no pity timer, no guaranteed roll after N attempts, and no way to filter the mod tier before rolling.
| Larry Interaction | Cost | Outcome | Best Practice |
|---|---|---|---|
| Single reroll | Low token cost | One modifier slot rerolled on equipped weapon | Use when you are saving up |
| Bulk reroll (10x) | Discounted token cost | Ten consecutive rolls on equipped weapon | Only when bankrolled for a target |
| Lock a roll | 0 tokens | Confirms a rolled modifier in your Codex | Always lock good rolls immediately |
| Reroll locked mod | High token cost | Resets a locked roll to a fresh one | Almost never worth it |
The lock-a-roll mechanic is the most underused feature in the Larry economy. The moment you roll a modifier you actually want, lock it before queuing another mission. The Code does not always save your best rolls on its own, and a session-ending disconnect or a quick re-equip can wipe an unconfirmed roll.
A common rookie mistake is using Larry at low Threat to "test" the reroll system. This is a token sink. The skins you roll at Threat 1 are the same skins you can roll at Threat 7, and the tokens you spend on test rolls at low Threat are tokens you are not spending on the weapon you actually care about. Skip the test rolls, save the tokens, and only feed Larry when you have a target weapon in your hands and a stockpile ready.
For a deeper look at how the token economy feeds into the broader progression loop — including how the Backlog payouts interact with Pattern Infusion and the Turbocharge bench — the upgrade and crafting guide maps the full resource flow.
Matching Difficulty to Your Squad
The single best use of this Mycopunk difficulty guide is not the threat chart or the backlog table — it is learning to read your squad and match the slider to the people actually playing. A 4-stack of three employees at Level 30 and a freshly rescued Mycologist at Level 1 can comfortably run Threat 6. A 4-stack of four Level 10 employees is going to get rolled at Threat 5.
The honest read on squad power is that employee level, upgrade tier, and role synergy all matter more than raw headcount — a 4-stack of three Level 30s and a Level 1 Mycologist can run Threat 6 because the carries burst down threats, the upgrades stabilize the weak link, and the Glider or Wrecker covers downtime; flip those two slots and the same squad crumbles at Threat 4, because no single player can hold a lane against a modifier-heavy wave on their own.
-
All Level 1-10 employees: Threat 1-2 is your learning zone, Threat 3 is a stretch goal. Focus on the first hour priorities and do not chase Threat 4+ until everyone has at least Standard-tier upgrades unlocked.
-
Mixed Level 10-20 employees: Threat 3-4 is the sweet spot, Threat 5 is doable with good communication. This is the bracket where the Backlog starts paying you back for the first time.
-
All Level 20+ employees with Epic upgrades: Threat 5-6 is comfortable, Threat 7 is the dedicated farming tier. Antimass flow becomes reliable here.
-
All Level 30 employees with Exotic or Exotic+ upgrades: Threat 7 is the default for farming runs. Anything below Threat 6 starts feeling like a waste of time, because the Antimass and token payouts are not worth the slot.
The 1.0 launch also introduced the Death Protection mechanic, which is a one-time per-mission save that triggers when a teammate goes down. This is a significant quality-of-life change for squads who were running Threat 5-6 in Early Access and eating one or two wipes per session. Plan your threat slider with the assumption that Death Protection is active — it is not a substitute for positioning, but it does let you push the slider one notch higher than your muscle memory suggests is safe.
Mission modifiers should also be part of the squad-matching calculation. A Threat 5 run with a harsh modifier (exploding barrel enemies plus reduced healing, for example) is functionally a Threat 6 run. The official mission select screen shows modifier icons before you confirm the queue, so read them. If you see a modifier combo that you know your squad struggles with, drop a tier of Threat to compensate.
The X11-B moonlet, the new 1.0 high-difficulty region, sits a notch above the rest of the game. Enemies there are tougher, and periodic electromagnetic storms disable abilities, which means a Glider whose entire kit is the Wingsuit and Rocket Salvo is effectively useless during a storm window. X11-B missions also unlock the Snowball Grenade at X11-B extraction, the cryo grenade that the developer has only partially documented — they have confirmed one favorite upgrade lets you "roll it down a hill to gain size like a cartoon," but the rest of the upgrade list is intentionally unpublished. Do not bankroll token farming on the assumption that you will quickly learn the full Snowball Grenade tree.
Frequently Asked Questions
What is the fastest way to farm Lottery Larry tokens in Mycopunk?
The fastest token farming path is a Threat 6-7 mission loop on a region you have already cleared for the Backlog, because the Cargo Pod reward tier scales with Threat. Backlog completions pay the largest single chunks (200+ tokens per category), so do not skip those tracks. Spreading rerolls across multiple weapons will drain your stockpile fast, so bank tokens until you can afford a focused reroll session on one target weapon.
How does the Backlog system actually work in Mycopunk?
The Backlog is a tiered reward program that tracks cumulative progress across four families: Employee Mastery, Weapon Tryout, Region Sweep, and Mission Variety. Most tasks are counter-based, so they fill as you play rather than as you grind. Payouts include lottery tokens, sit emotes, Hat cosmetics, and the occasional Fulfillment unlock. The cadence is roughly weekly per family, not daily, so trying to clear everything in one session is fighting the design.
Do skin modifiers in Mycopunk actually matter?
Yes, because they alter projectile speed, reload time, damage type, and status proc chance on a per-weapon basis. Two copies of the same skin on the same weapon can roll different modifiers, so the Codex inspection is the only way to confirm what you have. Elemental Synergy rolls are the most valuable for 4-stack farming, while Utility rolls are the most valuable for solo play.
Is there a Threat 8 in Mycopunk?
No. The developer has stated in the 1.10.1 patch notes that Threat 8 is not currently a thing and is only on the long-term roadmap. The live scale is Threat 1 through Threat 7, and X11-B sits within that same ladder as a high-difficulty region, not as a tier above it.
What should I prioritize on the Backlog first as a new player?
Prioritize Employee Mastery and Mission Variety first, because they unlock the fastest and pay out the most lottery tokens per hour invested. Region Sweep takes longer to progress because it depends on traveling to maps you may not have unlocked yet. Weapon Tryout is a background task that you can advance passively just by swapping your loadout occasionally — no need to force it.