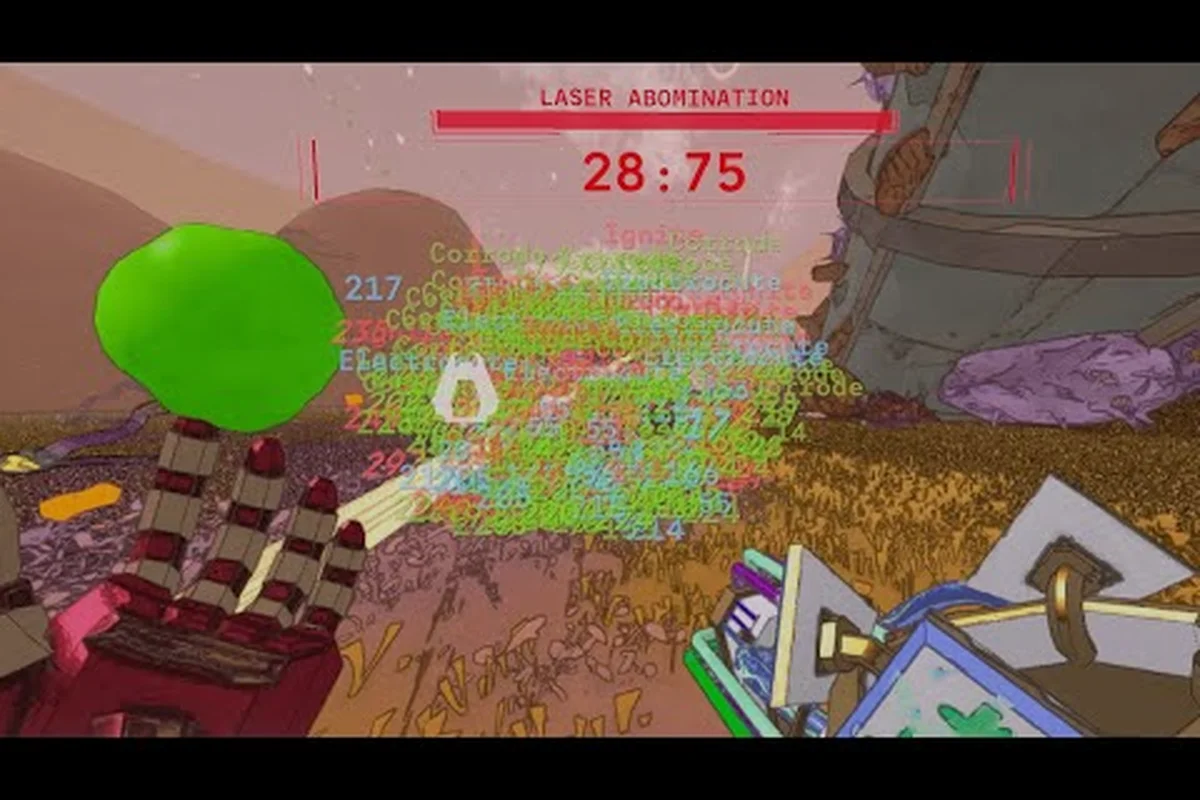
In a co-op looter shooter where every employee sprints into a 13-room Ouroboros run with the same handful of weapons, the teams that survive longest are the ones whose elements keep ticking after the trigger finger lifts. Mycopunk's damage over time system rewards that patience, layering cryo shatter chains, plasma arcs, and burn ticks on top of direct hits so the Amalgamation or Abomination keeps melting even while your squad reloads. The developer at Pigeons at Play has never published a closed element list, but the partial roster — cryo, plasma, acid, rot, blood, shock, bees, and water — already gives skilled crews enough scaling hooks to build entire loadouts around. This guide maps every damage over time source the community has confirmed, shows how to stack them without eating your own health bar, and points to the official patch notes that explain the integer-overflow bug that used to make late-game damage mysteriously stop landing. amage over time source the community has confirmed, shows how to stack them without eating your own health bar, and points to the official patch notes that explain the integer-overflow bug that used to make late-game damage mysteriously stop landing, while the deeper breakdown of each element's status interactions — including which Myco-strains amplify burn, freeze, or corrosion — lives in our Mycopunk Element Effects reference.
Mycopunk Element System and Damage Over Time Overview
Mycopunk treats elements as a secondary damage layer that sits on top of your weapon's base ticks. Each element has a base application (a grenade, a projectile, an upgrade proc) and a base reaction (the dot that keeps draining health after the initial hit). Because the developer has not published a closed list, the safest way to reason about damage over time in Mycopunk is at the mechanic level: every element has a chance to apply on hit, every applied element has a duration, and certain pairs of elements produce a reaction that deals burst damage on top of the tick.
| Element | Common Application | Tick Behavior | Confirmed Reaction Pair |
|---|---|---|---|
| Cryo | Snowball Grenade, cryo-tagged weapons | Slows, then freezes targets | Cryo + impact = shatter (burst + bonus damage) |
| Plasma | Voltaic-style orbs, plasma-tagged weapons | Short electric arc ticks | Plasma + impact = plasma arc chains |
| Acid (Caustic) | Caustic Grenade, acid pools | Health-per-second drain | Acid + impact = solidified acid detonation |
| Rot | Rot-tagged weapons and grenades | Stacking decay over time | Rot + damage = residue accumulation |
| Blood | Blood-tagged sources | Self damage that heals allies | Blood + impact = turkey's bloodlust burst |
| Shock | Voltaic Grenade, shock sources | Stun plus arc ticks | Shock + impact = storm's eye pulse |
| Fire / Burn | Incendiary Grenade, fire-tagged weapons | Damage-per-second burn | Fire + impact = molotov spread |
| Bees | Bee-tagged weapons | Swarming dot | Bees + impact = area denial cloud |
Cryo is the cleanest entry point for new employees. The Snowball Grenade, which unlocks from the X11-B moonlet, lays down a slow field that reliably freezes regular enemies and chunks boss armor; a single follow-up impact triggers the shatter reaction, and a stunned Brute or Devastator drops like a sack of Saxonite. The chain matters: freeze first, then shoot, because impact damage against an already-frozen target is what converts the dot into a burst. If you shoot first and apply cryo second, you waste the reaction window and the enemy keeps walking.
Plasma operates on a different rhythm. Where cryo rewards patience between hits, plasma rewards volume. A plasma-tagged weapon chains arcs between every enemy in a clump, and the resulting ticks add up faster than any single bullet would. That makes plasma the best element for crowd-clear rooms, and it also explains why Voltaic Grenade (the renamed Shock Grenade) and the plasma-typed upgrades see play in every Ouroboros loadout. Plasma arc chains inherit the damage of the originating hit, so a high-tier weapon with plasma damage carries arcs that hit like the gun itself.
Acid (now called Caustic at 1.0) and rot both sit in the sustained-damage bucket. They do not combo as dramatically as cryo shatter, but they keep ticking long after the trigger finger is on cooldown. Acid pools from the Caustic Grenade are particularly nasty in tight rooms because the dot stacks with subsequent hits, and the solidified acid reaction detonates the pool for burst damage when an impact lands. Rot is a slower cousin that you usually inherit from your weapon's upgrade rolls rather than a dedicated grenade.
Fire and burn are where the developer leans into the over-time fantasy. Incendiary Grenades set the floor on fire, and the dot keeps eating health for several seconds. Fire is one of the easiest damage over time sources to apply, and because it is also the most common upgrade roll on weapons like the Lead Flinger, fire shows up in almost every high-threat loadout even when the player did not specifically build for it.
Blood and bees are niche but powerful. Blood applies a self-damage dot that converts into ally healing, which is why dedicated blood builds turn the squishiest employee into a frontline tank. Bees, when they proc, lay down a swarm that keeps damaging anything in the area. The developer has not published damage numbers for either element, but community testing reports that blood builds are the only way to keep a four-player squad topped off during the Amalgamation's 30-second burn phase, while bees dominate small-room clear speeds.
Why Damage Over Time Wins Late Game
Once your squad pushes past Threat 5 and the Ouroboros bosses start layering immune frames and shield phases, direct damage becomes unreliable. The bosses spend more time invulnerable than vulnerable, and your team's total damage per second has to come from somewhere. Damage over time ticks continue to drain health through every immune window because the dot is a status effect, not an incoming projectile. That is why a properly applied cryo shatter or a stacked acid pool can out-damage a full magazine of bullets against a phased Amalgamation.
The same principle holds for self-damage. Mycopunk's blood element and a few exotic upgrades force the player to take damage in exchange for a damage over time burst. Without those mechanics, the late-game economy would punish aggression because every hit you take is wasted time off the clock. With them, a Bruiser rocking Saxonite Shackles and a blood-tagged Swarm Launcher can deliberately soak damage and convert it into kill pressure.
Cryo, Shatter, and Slow Chains
Cryo is the most reactive element in the Mycopunk toolkit. The Snowball Grenade — the developer's own example of an upgrade that lets you "roll it down a hill to gain size like a cartoon" — drops a slowing field that reliably freezes any non-boss enemy inside its radius. Bosses take partial slow but never freeze, which is exactly why the shatter reaction exists: it gives a burst damage window that bypasses the immunity frames bosses get during their phase transitions.
| Cryo Source | Application Type | Duration | Shatter Trigger | Shatter Bonus |
|---|---|---|---|---|
| Snowball Grenade (X11-B) | AOE slow field | ~3 seconds | Any impact inside the field | Confirmed burst; number not published |
| Cryo-tagged weapon hit | Single-target slow | ~2 seconds | Direct hit on slowed target | Confirmed bonus; number not published |
| Subzero Energy upgrade | Aura around player | Passive | Allies' shots inside aura | Confirmed bonus; number not published |
| Permafrost Wave upgrade | Wave on ability use | Short | Any enemy hit by the wave | Confirmed; number not published |
| Ice Cube upgrade | Solidify on kill | Short | Next shot on the iced target | Confirmed; number not published |
| Ice Skates upgrade | Movement utility | N/A | N/A (mobility, not damage) | N/A |
The shatter reaction is a true damage spike. The community has reported consistent behavior across both regular play and the Ouroboros run, and the developer has not published a numeric coefficient, which means the only safe statement is that shatter damage scales with the impact that triggers it. A G6 Streetsweeper crit against a frozen target will shatter for more than a basic Lead Flinger hit, which in turn sets up the next freeze cycle if you can land a follow-up cryo source before the slow expires.
The trick is timing. Snowball Grenade has a tell — a brief wind-up animation — and the slow field takes a fraction of a second to actually apply the cryo status. If you throw and immediately shoot, your impact will often land before the slow is fully active and the shatter window is lost. The community-recommended pattern is to throw, reposition for two beats, then commit to the shot. That rhythm shows up in almost every recorded high-threat run, and it is the same rhythm the developer teased when they described the cartoon-rolling grenade in the patch notes.
Cryo also chains with the Subzero Energy upgrade, which turns the player into a passive aura source. Inside that aura, any ally's shot on a slowed target triggers shatter automatically. That makes Subzero Energy the highest-value cryo upgrade for co-op play because it converts the entire squad's damage into shatter pressure. A four-player stack running Subzero Energy plus four Snowball Grenades can cycle a high-threat room in under twenty seconds because every shot after the first freeze is a guaranteed shatter.
Permafrost Wave and Ice Cube extend the same logic to specific weapon archetypes. Permafrost Wave triggers on ability use, which means it works well with employees who can spam abilities — Glider's Rocket Salvo or Wrangler's Rocket Lasso both qualify. Ice Cube solidifies killed enemies and gives the next shot a guaranteed shatter on the next target the projectile lands on, which is a great pairing with rapid-fire weapons like the A16 Beam Ripper or the DMLR. Ice Skates rounds out the cryo family as a pure mobility tool, but it deserves mention because it lets a player reposition faster, which means more cryo applications per minute.
The X11-B moonlet itself is worth understanding in this context. The developer has confirmed that periodic electromagnetic storms on X11-B disable abilities, but the Snowball Grenade still works during those storms because it is a thrown item, not an ability. That makes cryo the most reliable damage over time source on the highest-difficulty region, and it explains why most launch-week builds that target X11-B carry at least one Snowball Grenade per employee.
Plasma Arcs, Shock, and Electric Dot Stacking
Plasma is the volume king of the Mycopunk element roster. Where cryo rewards deliberate shot placement, plasma rewards spraying into a crowd and watching the arcs do the work. The Plasma Arc reaction chains from one enemy to the next, and each chain inherits a portion of the originating hit. Stormcloud Accumulator is the most cited plasma upgrade in community testing, and Charging Port is the upgrade that turns a single hit into a sustained electric field.
| Plasma/Shock Source | Application Type | Tick Behavior | Stacking Notes |
|---|---|---|---|
| Voltaic Grenade (renamed Shock Grenade at 1.0) | AOE pulse | Arc ticks after impact | Stacks with subsequent grenades |
| Plasma-tagged weapon hit | Single-target arc | Arcs to nearby targets | Arc count capped; number not published |
| Plasma Arc upgrade | Reaction proc | Bonus chain damage | Confirmed; coefficient not published |
| Stormcloud Accumulator upgrade | Charge on hit | Releases electric burst | Stacks with weapon's base damage |
| Charging Port upgrade | Sustained field | Damage over time while channeled | Stacks with self-damage sources |
| Storm's Eye upgrade (Shocklance) | Weapon-specific | Pulse on hit | Unlocked via the Overtime Assignment |
The integer-overflow bug referenced in the 1.6.2 patch notes is worth mentioning here. According to the official 1.6.2 patch notes on Steam, the developer confirmed that "outgoing damage going immune in very long runs was most likely caused by damage overflowing the maximum integer value of 2,147,483,647." In practical terms, that means very long Ouroboros runs could see their damage over time ticks register as zero. The 1.6.2 patch improved how lobbies handle this, and the more recent the official 1.9.2 Steam announcement continue to fix Ouroboros-related bugs, but any build that relies on plasma arcs for thousands of ticks should be aware that the upper ceiling on damage is finite.
For most players, plasma never gets close to the overflow threshold, which is why plasma builds dominate Threat 4 through Threat 6 content. The Voltaic Grenade, now properly named after the 1.0 rename, is the cleanest entry point because it is unlocked early and it chains into crowds that are too dense to damage with single-target weapons. The Plasma Arc upgrade and Stormcloud Accumulator both push the chain damage higher, and a Bruiser rocking Saxonite Shackles plus a plasma-typed Swarm Launcher can carry a four-player squad through a 13-room Ouroboros Blitz by chaining arcs through every room.
Charging Port is the advanced option. It turns a single hit into a sustained electric field that continues ticking as long as the player channels. The downside is that the field also damages the player, which makes it a natural pair for the Connected Systems upgrade (which converts self damage into ally healing) and any blood-element source. A Wrangler with Charging Port, Connected Systems, and a plasma-typed weapon can channel an electric field through an entire room while their three allies stay topped off.
The Storm's Eye upgrade on the Shocklance deserves a separate mention because it is one of the few officially named damage over time procs tied to a specific weapon. The Shocklance itself unlocks via the Overtime Assignment, and once the player has it, Storm's Eye makes every hit pulse additional electric damage in a small radius. The Shocklance is not a top-tier weapon by raw damage, but Storm's Eye turns it into a crowd-control and damage over time tool that fits naturally into any element-focused build.
Burn, Acid, and Sustained Pool Damage
Burn and acid are the two damage over time sources that behave most like traditional "ground hazard" mechanics. They leave a zone on the floor, the zone ticks for damage, and the zone can be detonated for bonus damage if the player lands a triggering impact inside it. The Incendiary Grenade and the Caustic Grenade (renamed from Acid Grenade at 1.0) are the two entry points, and both have dedicated upgrades that push their dot damage into the late-game scaling range.
| Source | Type | Duration | Detonation Reaction | Detonation Bonus |
|---|---|---|---|---|
| Incendiary Grenade | Fire pool | Several seconds | Molotov spread on impact | Spreads fire to nearby enemies |
| Caustic Grenade | Acid pool | Long | Solidified Acid detonation | Burst plus DoT refresh |
| Tinderbox upgrade | Fire damage on hit | Short burn | Molotov chance on burn tick | Confirmed; number not published |
| Molotov upgrade | Fire dot | Sustained | Triggered by burn tick | Confirmed; number not published |
| Residue upgrade | Damage on hit | Stacking | Practice Makes Perfect synergy | Confirmed; number not published |
| Practice Makes Perfect upgrade | Damage scaling | Sustained | Stacks with Residue | Confirmed; number not published |
| Portable Solar Array upgrade | Burn synergy | Sustained | Boosts burn damage | Confirmed; number not published |
| Ballistic Charger upgrade | Reload boost | N/A | N/A (utility) | N/A |
| Solidified Acid upgrade | Acid reaction | Detonation | Confirmed burst | Number not published |
| Adaptive Stabilizer upgrade | General damage | Passive | Boosts all element dot | Confirmed; number not published |
The Incendiary Grenade is the most accessible burn source. It is unlocked early, it sets a wide pool, and the dot keeps ticking for several seconds. The Molotov upgrade spreads the burn to nearby enemies whenever a burn tick lands, which means a single well-placed grenade can roll into a room-wide fire that the squad uses to kite enemies through. The Tinderbox upgrade adds a chance to apply burn on every weapon hit, which is the most consistent burn stacking tool in the game.
Burn scales especially well in rooms with chokepoints. The classic example is the City / Titan City region, where narrow corridors force enemies into lines. A Glider throwing an Incendiary Grenade into a corridor can lock down a Brute rush for several seconds, and a follow-up Scrapper grapple lets the squad reposition while the burn ticks. The Portable Solar Array upgrade boosts burn damage further, and the Practice Makes Perfect plus Residue pair converts sustained damage into a stacking bonus that eventually out-scales the base weapon.
Acid works on a longer clock. Caustic pools last longer than fire pools, and the Solidified Acid reaction detonates them for a burst that refreshes the dot duration. The community consensus is that acid is the best damage over time source for solo play because the player can drop a pool, kite enemies through it, and detonate it on their own schedule. For four-player co-op, the same logic applies but the squad has to coordinate to make sure the detonation hits the right target.
Acid and fire also interact with self-damage mechanics in interesting ways. Because the pools damage enemies who walk through them, the player can intentionally walk into a friendly acid pool to trigger self damage, which then feeds into the blood-element self-damage-to-heal conversion. This is an advanced technique and the developer has not published whether it is intentional, but community testing reports that it works consistently.
The Adaptive Stabilizer upgrade is a general-purpose element scaler that boosts all damage over time ticks. It is one of the few confirmed "all-element" upgrades in the game, which makes it a strong pick for hybrid builds that mix cryo, plasma, and burn. The Residue and Practice Makes Perfect pair is similarly general and stacks with the rest of the element kit. Together, these two upgrades are the most reliable way to push sustained damage into the late-game scaling range, and they appear in almost every published high-threat build.
Self Damage, Blood, and Risk-Reward Element Builds
Self damage is the most misunderstood mechanic in the Mycopunk element roster. The blood element applies a damage over time effect to the player that converts into ally healing, which means a blood build deliberately soaks damage to keep the squad alive. This sounds backwards, but in practice it is the only way to keep four players at full health during the Amalgamation's burn phase, where the boss deals a flat 30-second damage-over-time effect on the entire squad.
| Self-Damage Source | Effect | Conversion | Synergy |
|---|---|---|---|
| Blood-tagged weapon hit | Self dot | Converts to ally healing | Connected Systems upgrade |
| Turkey's Bloodlust upgrade | Self damage on kill | Heals squad on next proc | Confirmed; coefficient not published |
| Saxonite Shackles upgrade | Self damage on hit | Boosts damage output | Confirmed; coefficient not published |
| Charging Port upgrade | Electric self damage | Boosts electric field | Stacks with Connected Systems |
| Connected Systems upgrade | Self-to-ally conversion | Heals allies on self damage | Confirmed; coefficient not published |
| Confident Queen upgrade | Self-damage scaling | Stacks on hit | Confirmed; coefficient not published |
The Turkey's Bloodlust upgrade is the most cited blood-element proc in community builds. It triggers a self-damage burst on every kill, and the burst converts to ally healing through the Connected Systems upgrade. The pair lets a single player act as a roaming healer, and the Saxonite Shackles upgrade pushes the same logic into a damage-dealing role by giving the player bonus damage in exchange for self damage. A Bruiser with Saxonite Shackles, Connected Systems, and a blood-tagged Swarm Launcher is the most common tank build in launch-week co-op.
Self damage is also a natural pair for the Charging Port upgrade. Charging Port forces the player to take electric damage in exchange for a sustained electric field, and the self damage from Charging Port can be converted to ally healing through Connected Systems. This lets a player run a sustained electric dot on the enemy team while their squad stays topped off. The build is fragile because the player is taking constant damage, but in a coordinated four-player squad, the heal output is so high that the player effectively becomes unkillable.
Confident Queen is a more aggressive self-damage upgrade. It converts self damage into a stacking damage bonus, which means the more damage the player takes, the more damage the player deals. Combined with a blood-tagged weapon and a dedicated healer, a Confident Queen build can out-damage a pure direct-damage build by a wide margin, but only if the player is willing to live at low health. The mechanic rewards aggressive play, which is why most Confident Queen players are Bruisers with the Shield Projector.
The risk-reward calculation is real. Self-damage builds die faster if the squad cannot keep up the healing pressure, and a single missed cycle in the Amalgamation fight can wipe the team. The community has published several versions of the build, and the consensus is that self-damage is a four-player mechanic — solo players should not try to run a blood build because the healing conversion has no allies to target.
One more note on self damage: the Saxonite Shackles upgrade, like Saxonite Shackles in general, is tied to the Saxonite resource. The resource drops at approximately 60% rate at Threat 7, which means a self-damage build is most efficient in the highest-threat content. A four-player squad that has pushed to Threat 7 has so much Saxonite flowing that the self-damage cost of Shackles is essentially free, and the damage bonus becomes the dominant factor in boss kill speed.
Scaling, Synergies, and When to Lean on Direct Damage
Damage over time in Mycopunk is not always the right answer. There are rooms where direct damage wins, and there are boss phases where applying a dot is a waste of time. The skill ceiling in Mycopunk is knowing when to lean on each.
| Situation | Best Element | Why |
|---|---|---|
| Crowded rooms (4+ enemies) | Plasma | Arc chains multiply damage |
| Single tough enemy (Brute, Devastator) | Cryo shatter | Burst damage on freeze |
| Long kites (corridor chokepoints) | Burn / acid | Pool damage scales with kiting time |
| Boss immune phases | Any dot | Dot ticks through immunity |
| 4-player Amalgamation fight | Blood + self damage | Keeps squad healed through 30s burn |
| Solo play | Acid | Player controls detonation timing |
| X11-B moonlet | Cryo | Ability storms do not disable grenades |
| Threat 7 farming | Any element + self damage | Saxonite flow makes self-damage free |
The general rule is: dots win when the enemy has high health and the squad has time to set up. Direct damage wins when the enemy is low health and the squad needs to clear quickly. The crossover point is around the time it takes to apply the dot versus the time it takes to kill the target directly, and experienced players learn to read that crossover in real time.
Synergies are where the build diversity lives. Subzero Energy plus four Snowball Grenades is a cryo shatter machine. Plasma Arc plus Stormcloud Accumulator plus Charging Port is a plasma crowd-clear machine. Molotov plus Tinderbox plus Portable Solar Array is a burn scaling machine. Turkey's Bloodlust plus Connected Systems plus Saxonite Shackles is a self-damage tank. Residue plus Practice Makes Perfect is a general-purpose sustain machine. Every one of these combinations works on its own, and the best four-player squads mix two or three of them to cover each other's weaknesses.
The upgrade rarity ladder is the other major scaling lever. The developer has confirmed that Standard upgrades unlock at player level 3, Rare at 8, Epic at 16, and Exotic+ at 30. Most of the damage over time upgrades above Epic are locked behind the level 30 ceiling, which means a new employee cannot build a serious dot loadout until they have hit the cap. The weapon-level reward at player level 32 is the final unlock that lets the build come together. For players who have not yet hit 30, the recommended path is to focus on the lower-rarity dot upgrades first (Molotov, Residue, Plasma Arc, Turkey's Bloodlust) and save the Exotic+ options for the endgame.
Finally, the developer's own upgrade rotation means that not every dot upgrade is available in every run. Ouroboros adds Contraband and Oddity rarities, and the Contraband upgrades are exclusive to that mode. A serious dot build has to account for the upgrade pool of the specific mission type, and that means reading the Upgrade Grid carefully between rooms. The hex-pattern board is the single most important interface in the game for damage over time builds, and learning to read it is the difference between a run that craters at room 9 and a run that clears the Amalgamation at room 13.
Frequently Asked Questions
What is the best damage over time element in Mycopunk?
There is no single best element because each one solves a different problem, but the most consistent high-threat pick is cryo because the shatter reaction gives a burst that bypasses boss immunity frames. Plasma wins in crowd-clear rooms, burn and acid win in long kites, and blood wins in four-player co-op where the squad needs sustained healing. The developer at Pigeons at Play has not published a closed element tier list, so the best choice depends on your squad comp and the mission type.
How does Mycopunk self damage work and is it worth it?
Self damage is a mechanic where blood-tagged weapons and a handful of upgrades force the player to take damage in exchange for a stronger effect. Turkey's Bloodlust plus Connected Systems converts that self damage into ally healing, and Saxonite Shackles converts it into a damage bonus. The mechanic is worth it in four-player co-op because the heal output keeps the squad alive through the Amalgamation's 30-second burn phase, but it is not recommended for solo play because the heal conversion has no allies to target.
Can I build around cryo shatter without the Snowball Grenade?
Yes, but the build is much weaker. Subzero Energy and Permafrost Wave both trigger shatter on impact inside their aura, and Ice Cube gives a guaranteed shatter on the next shot after a kill, but none of these are as reliable as the Snowball Grenade's area slow field. The Snowball Grenade is the developer's own example of a damage over time setup, and most launch-week builds assume at least one squad member is carrying it.
Why does my damage stop landing in long Ouroboros runs?
The official 1.6.2 patch notes confirm that outgoing damage going immune in very long runs was most likely caused by damage overflowing the maximum integer value of 2,147,483,647. The patch improved how lobbies handle this overflow, but any build that relies on extremely high tick counts should be aware that the upper ceiling on damage is finite. If you are hitting the cap, the recommended workaround is to end the run and start a fresh one rather than push past room 17.
What is the best Mycopunk element build for new players?
New players should start with the Molotov and Tinderbox upgrade pair because both come from the Incendiary Grenade line, which is unlocked early. Burn is the most forgiving element because the pool ticks without precise aim, and the Molotov spread means a single good grenade can clear a room. Once the player has hit player level 16 and unlocked Epic upgrades, the recommended next step is to add the Residue and Practice Makes Perfect pair, which scales with sustained damage and works with any element.